How to View Visitor and Request Logs with Cloudflare
Welcome! This article will show you how to view detailed logs on all your visitors (Both human and robot) using your Cloudflare account!
Do you want to know who visits your website? This guide from the TinkerTechLab has got you covered! Read on to see how easy it is to get logs about your visitors and their actions!
Requirements
Before we get started, it is worth noting what you will need setup before starting this tutorial:
- A Cloudflare Account with your domain connected to it. Don't have one setup?
- You need to have Cloudflare's "Under Attack Mode" turned off. To turn it off, open your Cloudflare Dashboard, select your domain and turn off the "Under Attack Mode" toggle switch in the upper right.
Getting Started
First, let's get our Cloudflare Account ready, and connect the applications required to view the logs!
1. First, go to Logflare's Login page and log into your account using your preferred login method (if you don't have an account, one will created for you!)
2. After you are logged in, find the "New source" text field and enter a name, for example, "site.cloudflare", then click on "Add source". Logflare is now ready to be linked to Cloudflare!
3. Open your Cloudflare dashboard, select your domain, and head to the Apps section (Located in the sidebar).
4. Search for Logflare and select the first result.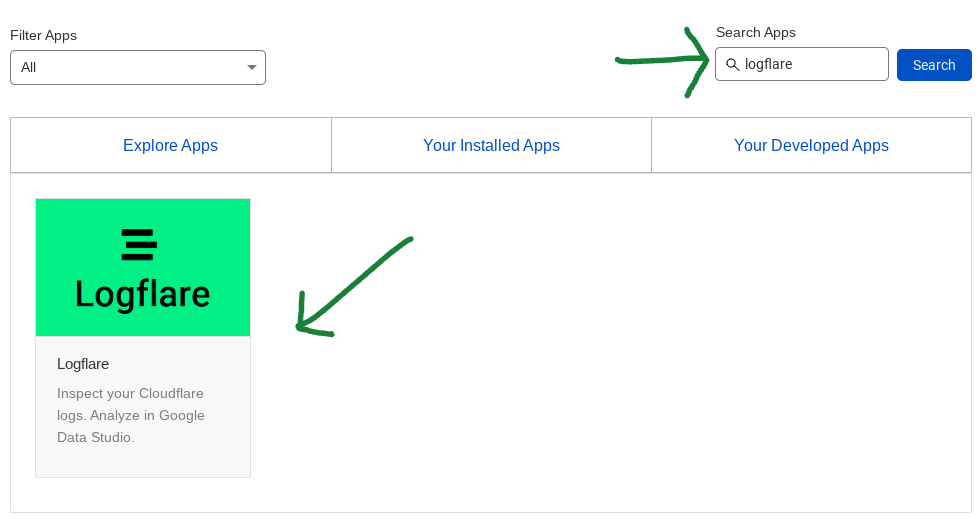
5. Click on "Preview on your site", and a new page will appear.
6. On the new page, click on the "Logflare" button and login to your Logflare account.
An error message may appear, but that's normal. If the error appears, click the "continue" button. You may have to repeat the previous 2 steps.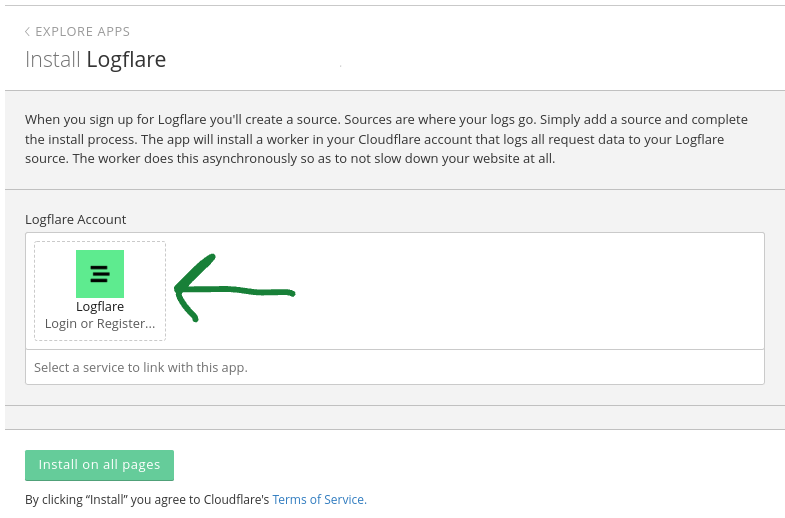
7. On the "Source" dropdown, select the source that you created earlier, then click "Install on all pages" at the bottom of the page.
8. A "Review permissions" box will pop up, click on Continue!
That's it, logging is now set up! Next, we will show you how to access your logs and sort them!
Advertisement

Accessing Logs
Ready to view your logs? Before you do so, you may want to load up your website and click througha few pages first. This way, there will actually be something in the logs that you can look at!
1. First, visit Logflare, and login to your account.
2. Click on the source that you just created.
3. View your logs! If you are looking for something specific, use the search bar at the bottom of the page.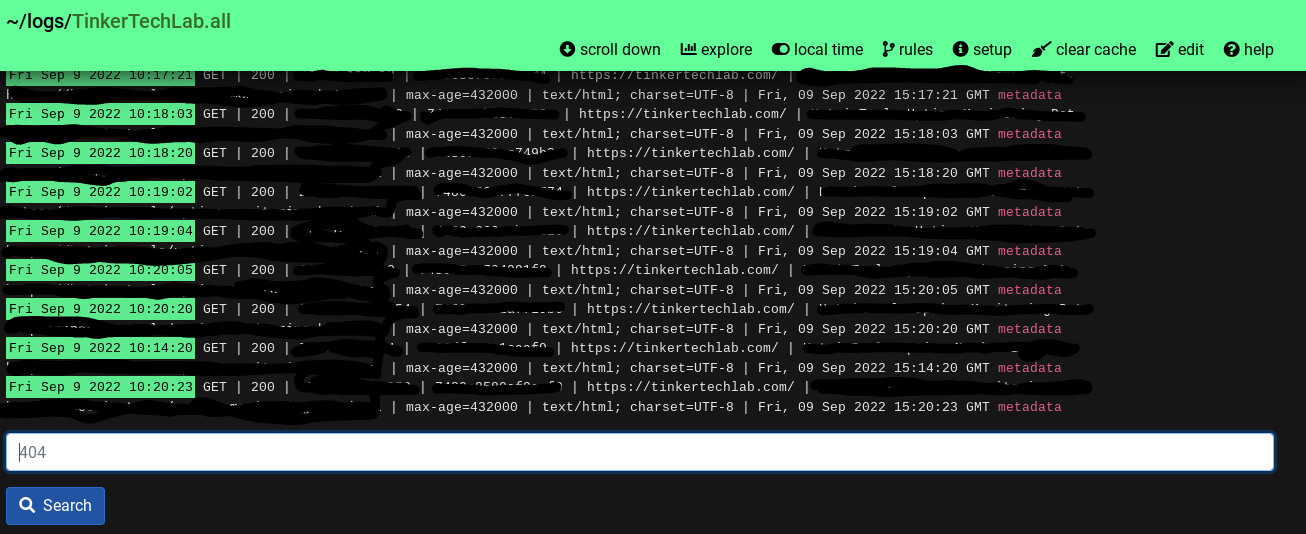 5. If you want more information about a certain event, click the purple "metadata" link at the end of the log entry.
4. Lastly, you can setup notifications via Slack, email, or SMS by clicking on the "Edit" button located near the top of the screen.
Conclusion
You have now setup Logflare on your domain, congrats! If you have any questions regarding Cloudflare or Logflare, don't hesitate to contact us! Lastly, if you have a privacy policy (And all websites should), make sure to add that you are using analytical software (Feel free to mention Logflare)!
The TinkerTechLab is not a law firm and will not be held responsible for any legal advice. If you have a legal question, contact a professional.
Advertisement

Article Author
Related Articles
One of the first thing that many tech support agents tell you to do is clear the cache and cookies of your browser. This guide will show you exactly how to do that for the most popular desktop and mob...
Advertisement